
Notes for photographers
Ricoh GR Settings and Review for Street Photography
The first-generation Ricoh GR, a pocket camera with the soul of a professional body: specifications, who it is for, and the settings that make it fast on the street.
Created June 21, 2016 · Updated November 17, 2026
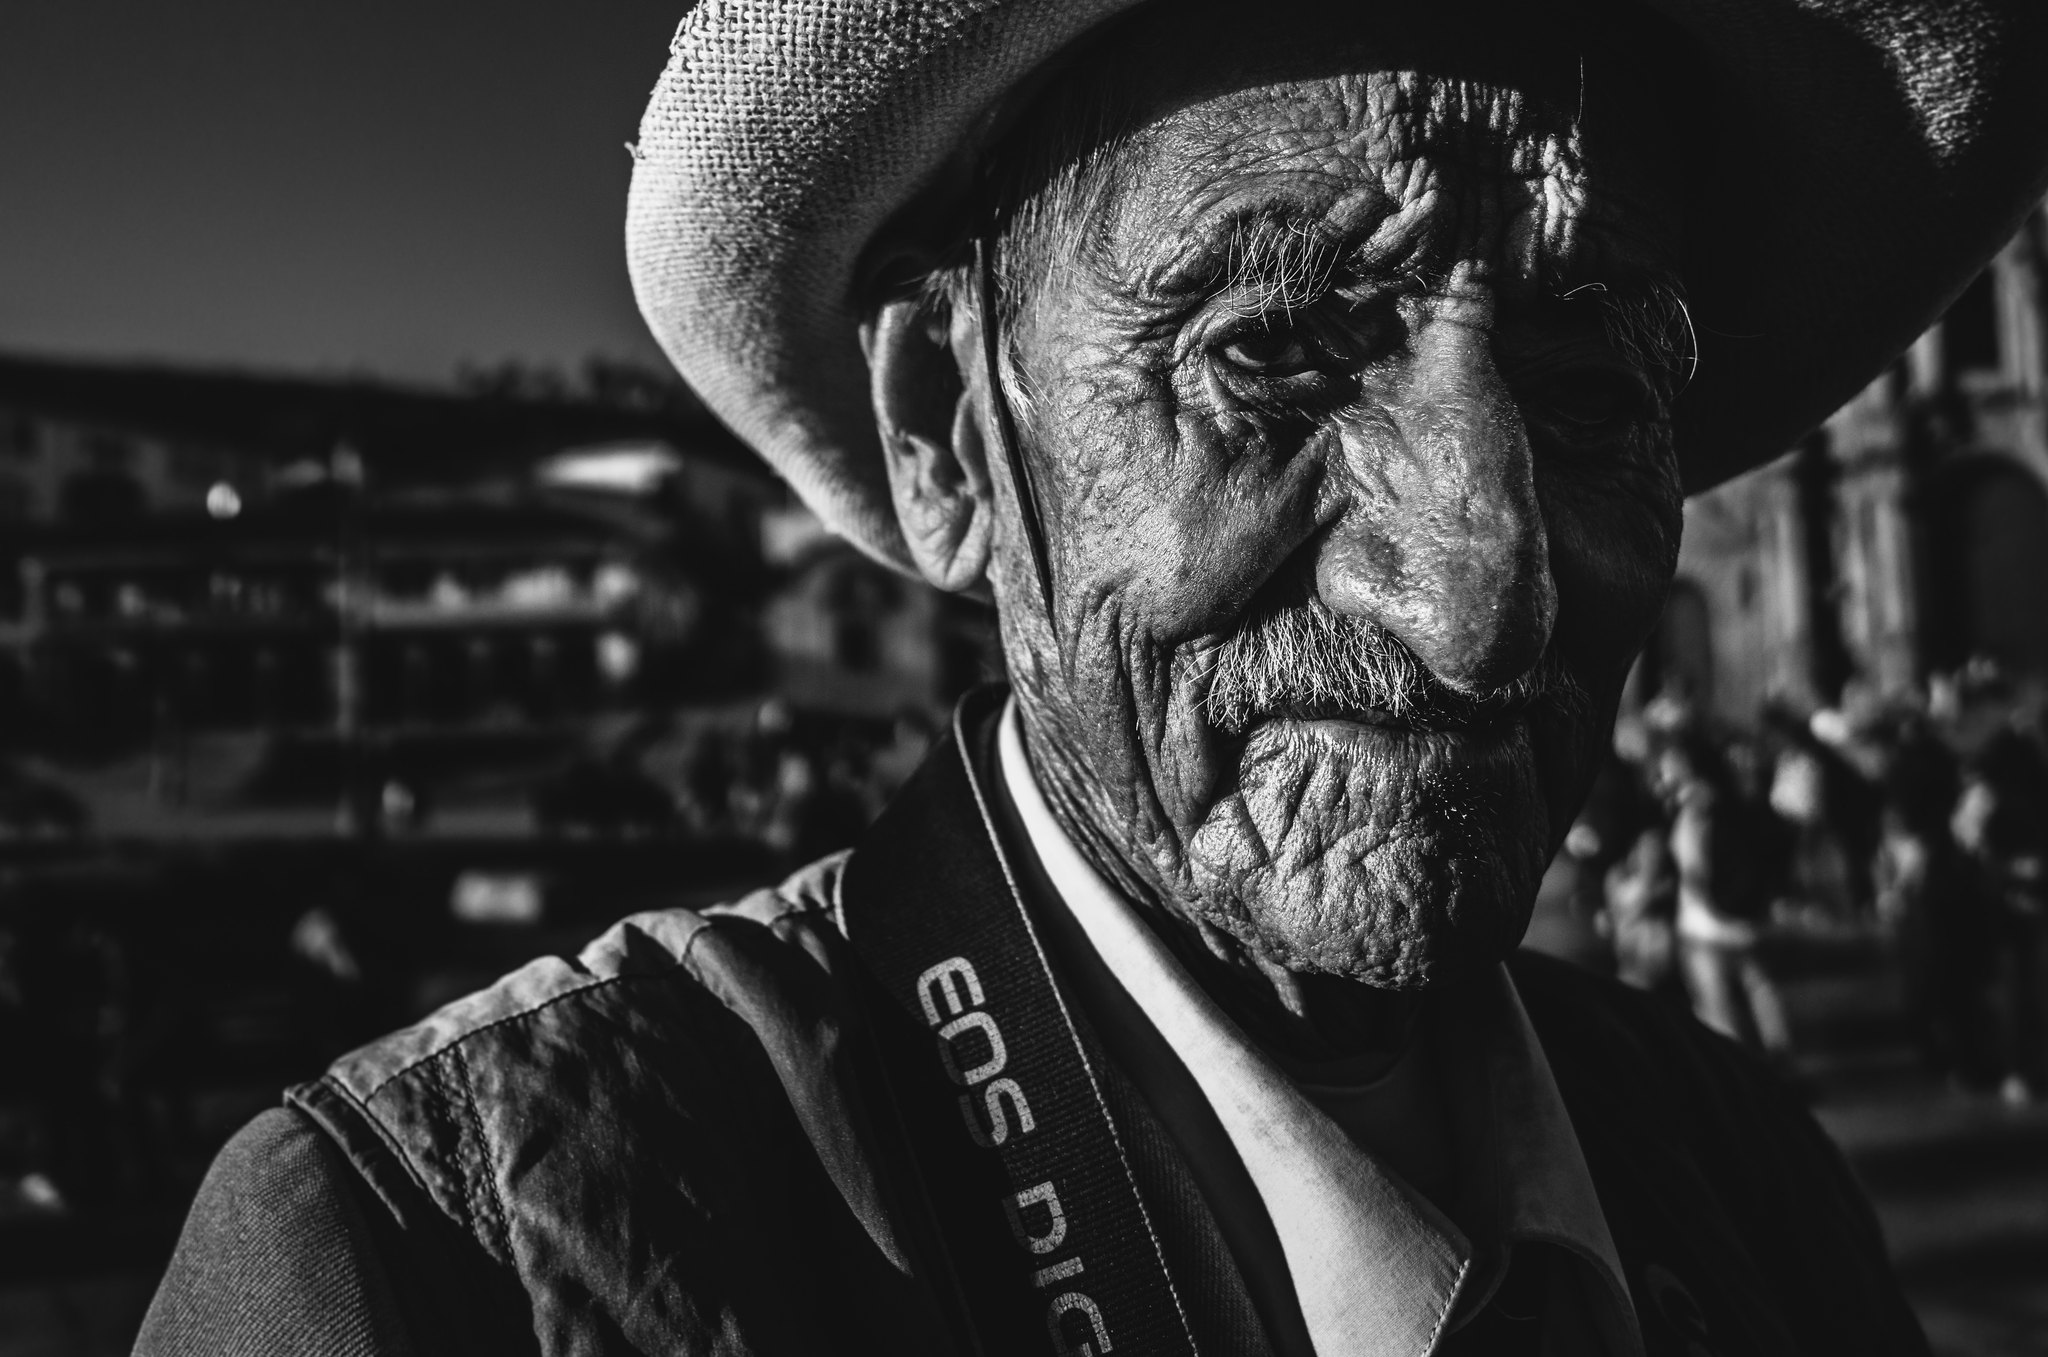
This review is about the first-generation Ricoh GR. Ricoh is now on the GR IV: some menus have changed since, but the way of working is the same. The photograph above, Manuel, a 93-year-old street photographer in Cusco, Peru, is one I made with this camera.
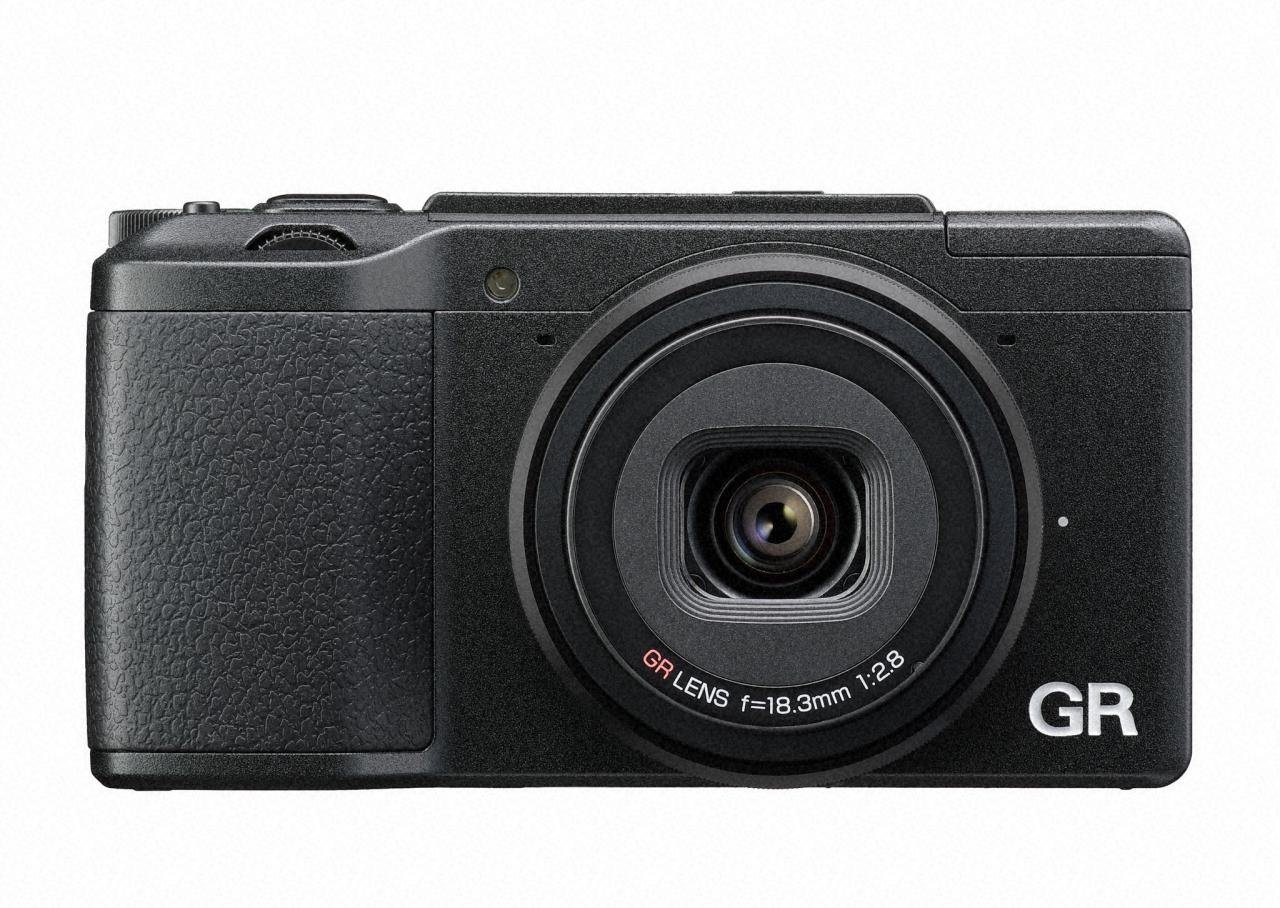
Ricoh GR specifications (first generation, 2016)
- Sensor: 16.2-megapixel APS-C CMOS, with no low-pass filter
- Screen: 3-inch LCD, 1,230,000 dots
- Weight: about 250 g with battery and SD card (wait, what?!)
- Lens: fixed 18.3 mm f/2.8, a 28 mm equivalent in full frame
The sensor is the perfect size and gives you files of 4928 × 3264 pixels, a little larger than those of a 12-megapixel Nikon D700. With no low-pass filter, the photos are sharper than from many other cameras, DSLRs included. The weight is one of its best features: not much more than a phone, so you can carry it in your pocket all day and almost forget it’s there. The built-in lens is a beauty, sharp and bright, good enough for almost any kind of photography.
Who should buy the Ricoh GR?
- Everyone, hahaha.
- Anyone looking for an unbeatable balance between price and performance.
- Anyone who wants a very light, very compact camera with high performance.
- Anyone who likes to change shutter speed and aperture with two dials, exactly like on a Nikon.
- Professional photographers who want something fully configurable.
- Anyone who loves street photography.
- Anyone who prefers wide lenses like a 28 mm or a 35 mm to tell stories.
- Anyone who knows that the best photos are not only made at f/1.4.
- Anyone who likes to work with manual focus.
Who shouldn’t buy it?
- Anyone who prefers a “known” brand.
- Anyone who wants a zoom or interchangeable lenses.
- Anyone who needs an optical or electronic viewfinder: the Ricoh GR only has live view on the screen.
- Anyone looking for a portrait camera with a 50, 85 or 105 mm lens: this one has a fixed 28 mm.
Tips and settings I recommend
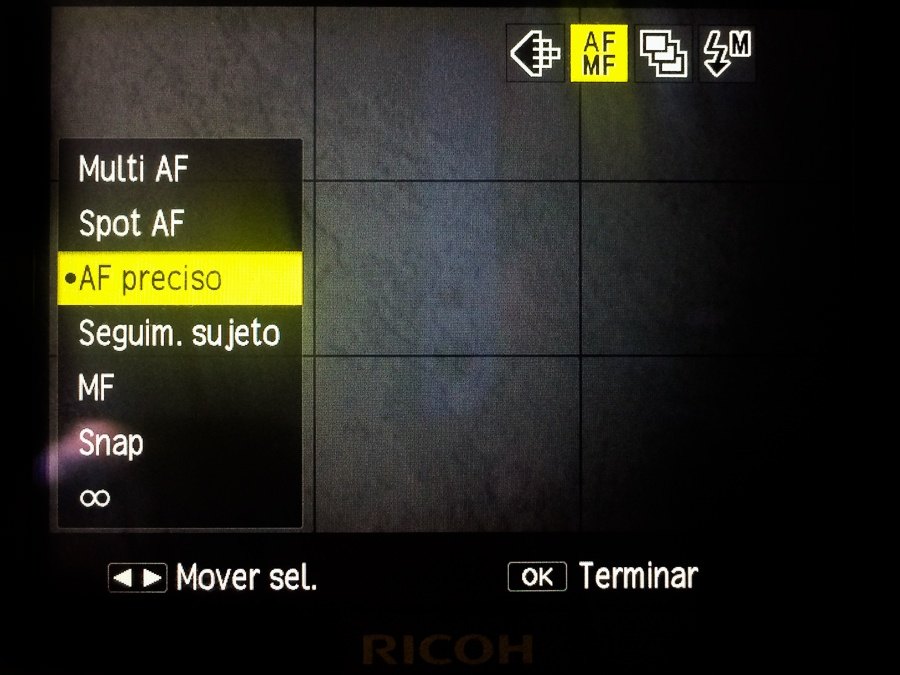
Manual focus. To focus, the Ricoh gives you not two, not three, not four, but seven modes: Multi AF, Spot AF, Pinpoint AF, Subject Tracking, Manual Focus, Snap and Infinity. When I work in autofocus I only use Pinpoint AF, the smallest focus point of all. When I focus manually I use Infinity or Snap, where you choose the distance in advance and it stays fixed until you change it. For street photography I suggest between 1.5 and 3 meters.
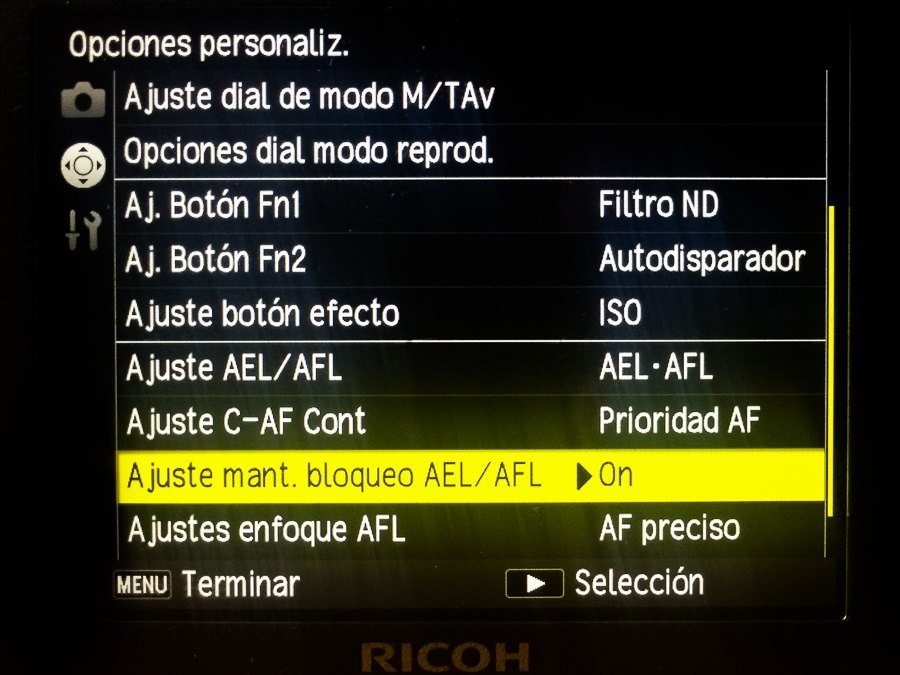
Autofocus on a button. If you work in manual focus and want autofocus for one particular shot, you don’t need to change modes or press several buttons. Set (1) the AEL/AFL button to AFL, (2) the C-AF setting to AF priority and (3) the AEL/AFL lock hold to On, and you’re done :-) You can keep the camera in manual focus all the time, or at the distance you choose, and the AEL/AFL button turns on autofocus, like the AF-ON button of a DSLR. I set it to focus and lock, but that is very personal, and you can leave the third setting Off. And when you work in autofocus, the focus is on the shutter button, but you can also start it with AFL, so the focus is independent from the shutter.
ND filter. In a few words, the built-in neutral density filter darkens your shot, and I find it amazing. Maybe you want a long exposure in the middle of the day, when there is a lot of light, or you want to use a flash in bright sun. Turn on the ND filter and you lose a couple of stops right away. In practice it’s as if the camera put on sunglasses: it sees much darker, and gives you a different exposure, one where you need to let in more light.
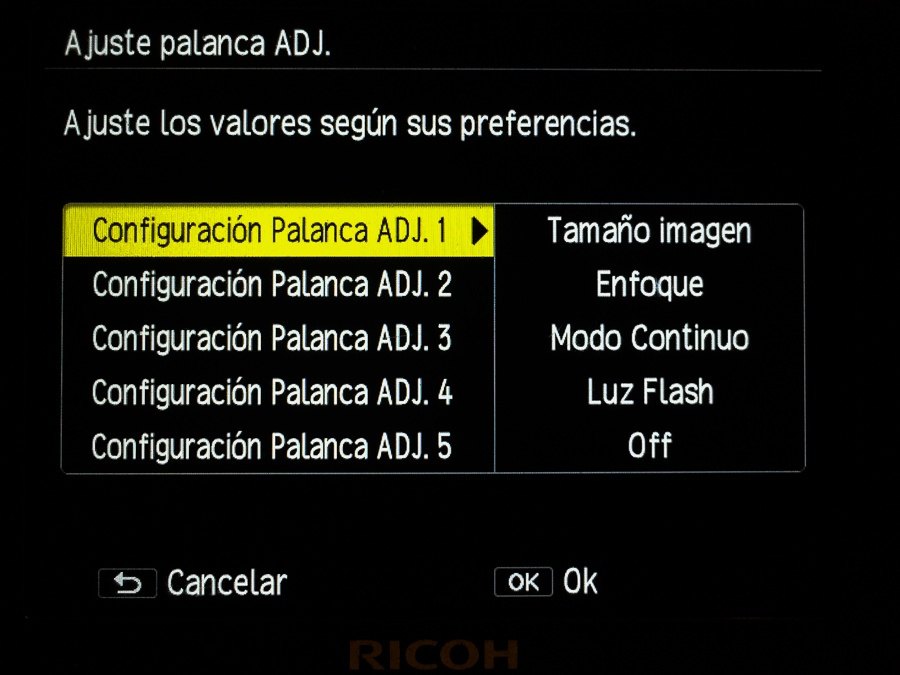
Function buttons. Some Nikon and Canon DSLRs have a single button you can assign a special function to (Fn); most have two (Pv and Fn). The Ricoh GR has three… oh yeah! Two are called Fn1 and Fn2, and a third one is called Effect. This gives me a lot of freedom, and I don’t waste time when I’m about to make a picture. On Fn1 I have the ND filter, on Fn2 the self-timer, and on Effect the ISO. That is what I like most: by default the ISO lives on the ADJ lever together with other functions, so changing it wasn’t that fast. The Effect button is also in a great spot. You can give each button whatever function suits the way you work.
TAv. Almost every camera has the classic exposure modes M, Tv, Av and P. The Ricoh GR also has TAv, which works with ISO priority: you choose the shutter speed and the aperture, and the camera chooses the ISO. Many DSLRs can do this, with auto ISO in manual mode, but I had never seen it right on the mode dial next to the others.
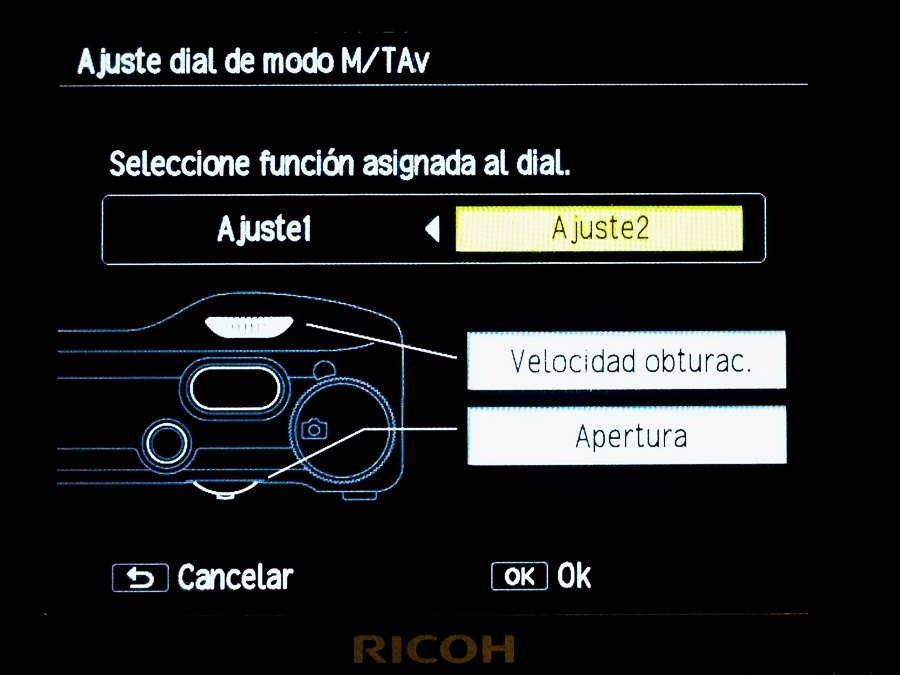
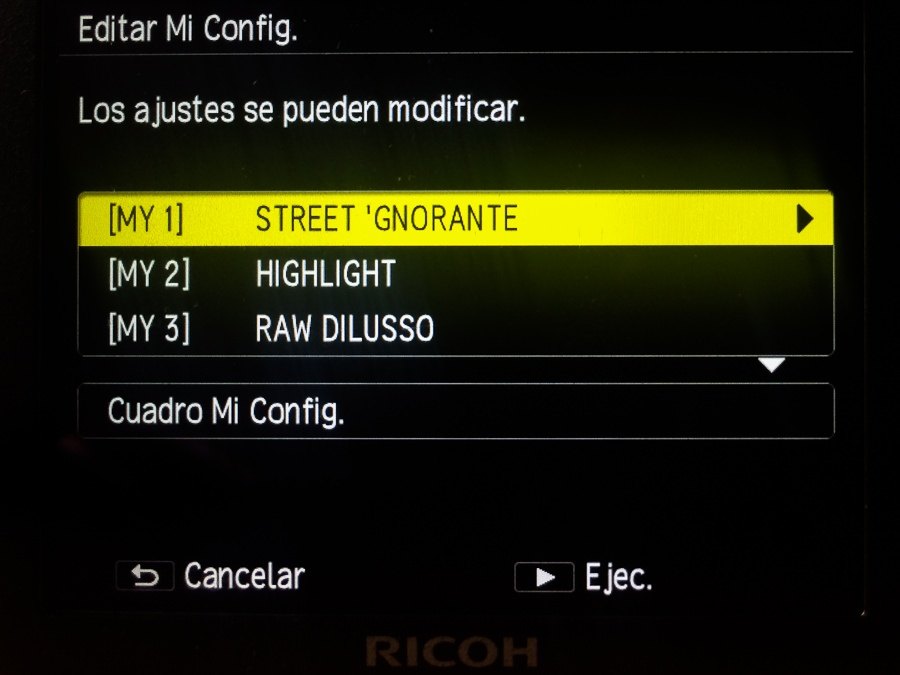
MY1, MY2, MY3. These are custom settings for the way you need to work.
In MY1, which I named STREET ’GNORANTE, I have a setup only for street photography: Av (aperture priority), high ISO, manual focus and −1.0 EV, because I always prefer a little darker rather than a little brighter.
In MY2, HIGHLIGHTS, I have a setup in manual, always with the same shutter speed, aperture and ISO, for hard light. With it I don’t have to think about exposure: if the light is hard, I select MY2 and I know my photos will have a perfect or very good exposure, without fighting to find it for that scene.
In MY3, RAW DI LUSSO, the camera is in P (Program) at ISO 640, with manual focus at infinity (∞) and −1.0 EV of exposure compensation. I use it, for example, when I’m in a car at 100 km/h and see something I like through the window, a landscape or anything else, and there’s no time to change the settings. I switch to MY3 and know that something decent will come out, in exposure and focus, without blur from the vibration and the speed of the car.
Bonus: more about the Ricoh GR
File quality. For a compact camera (a point-and-shoot), the quality is amazing, thanks to the missing low-pass filter: incredible sharpness and a lot of fine detail.
Macro. The minimum focus distance is perfectly normal for a 28 mm and works in many situations. If you want to get even closer, the macro function is one click away and lets you focus very near.
Flash. You can fire the built-in flash in manual, at the power you choose, from full power (1/1) down to 1/64. If you know how to combine a high ISO with a slow shutter speed, you can get very interesting results, even though the guide number is very small. The camera also has a hot shoe, for any flash that works in manual or for a radio trigger to fire an off-camera flash. A plus, I would say.
Processor. The camera is incredibly responsive. Whatever button you press or setting you change, it reacts in a fraction of a second, and it never freezes or slows down. If you have 500 photos on the card and want to look at them on the screen, you barely wait, RAW or JPEG. Amazing.
Looks. It is a compact, completely black camera, very, very discreet. If you photograph people on the street it’s perfect: nobody pays attention to you, and you pass for one more tourist taking pictures of anything :-) It weighs only about 250 g with battery and card, practically nothing. The buttons are very well placed, and ergonomically it’s perfect, even if you have big hands like mine, hahaha.
More from the journal

Notes for photographers
My Favorite Leica M10 Menu Settings
All my Ninja setup and favorites Leica M10 settings: a basic guide for menu best practice and take the most of your Rangefinder camera
Read the story

Notes for photographers
What’s Inside My Camera Bags
If I could, I would carry only one camera with one lens. Since I can’t, this is what I carry, and in what.
Read the story